
Removing a fabric snag without cutting is the safest and most effective way to protect your clothing. Cutting the loose thread weakens the fabric and often causes thinning or holes later. The correct method restores the surface by guiding the fiber back into the weave.
Why Cutting Snags Causes Permanent Damage
A snag is usually just a displaced fiber. When you cut it, you permanently remove tension from the surrounding threads. Over time this causes the area to stretch, thin, and weaken.
This is why professional repair always follows the same principle used in how to fix snagged fabric, reposition, don’t remove.
Step-by-Step: Removing a Snag Without Cutting
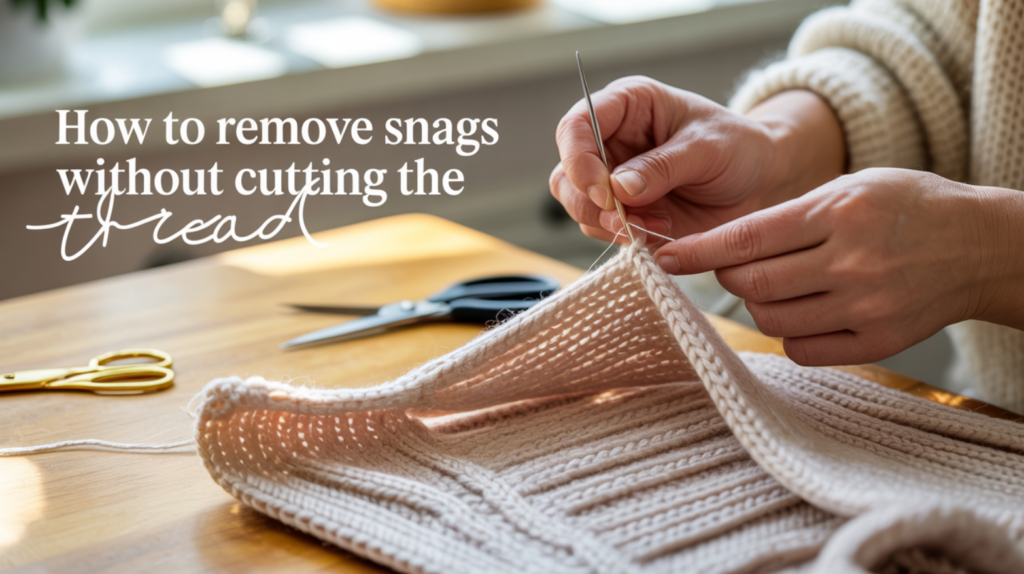
1. Lay the Fabric Flat
Place the garment on a smooth surface and gently flatten the area around the snag.
2. Insert a Fine Needle
Push a needle through the fabric close to the base of the snag.
3. Hook the Loose Fiber
Catch the snagged thread with the needle and gently pull it through to the back of the fabric.
4. Smooth the Surface
Massage the fabric between your fingers so the fiber blends back into the weave.
This same technique is used in how to repair snags in clothing and works for most garment types.
Handling Stubborn or Large Snags
If the snag is long or difficult to pull through, use a snag repair tool or repeat the process from a nearby point rather than pulling harder. For thick fabrics and textured materials, see best tools for removing fabric snags.
Special Care for Sweaters and Knits
Knit fabrics require extra patience because the snagged loop can distort the entire pattern. In these cases, follow the methods in how to fix snagged sweaters and how to fix snags in knit fabric to restore the fabric’s shape.
Preventing Snags After Repair
Once the snag is removed, protect the garment by avoiding sharp jewelry, rough surfaces, and high-friction washing. For a full prevention plan, return to
how to fix fabric snagging